As Windows 11 24H2 is being rolled out more in organizations, I came across this issue with two different clients in November. I read online that that a new Windows 11 24H2 device that has the Pro SKU, the OEM did not install the required feature, therefore , it fails to enroll correctly with the Defender for Endpoint service. This article will provide a solution how to fix the Defender enrollment failures with Windows 11 24H2 devices.
Table of Contents
Scenario
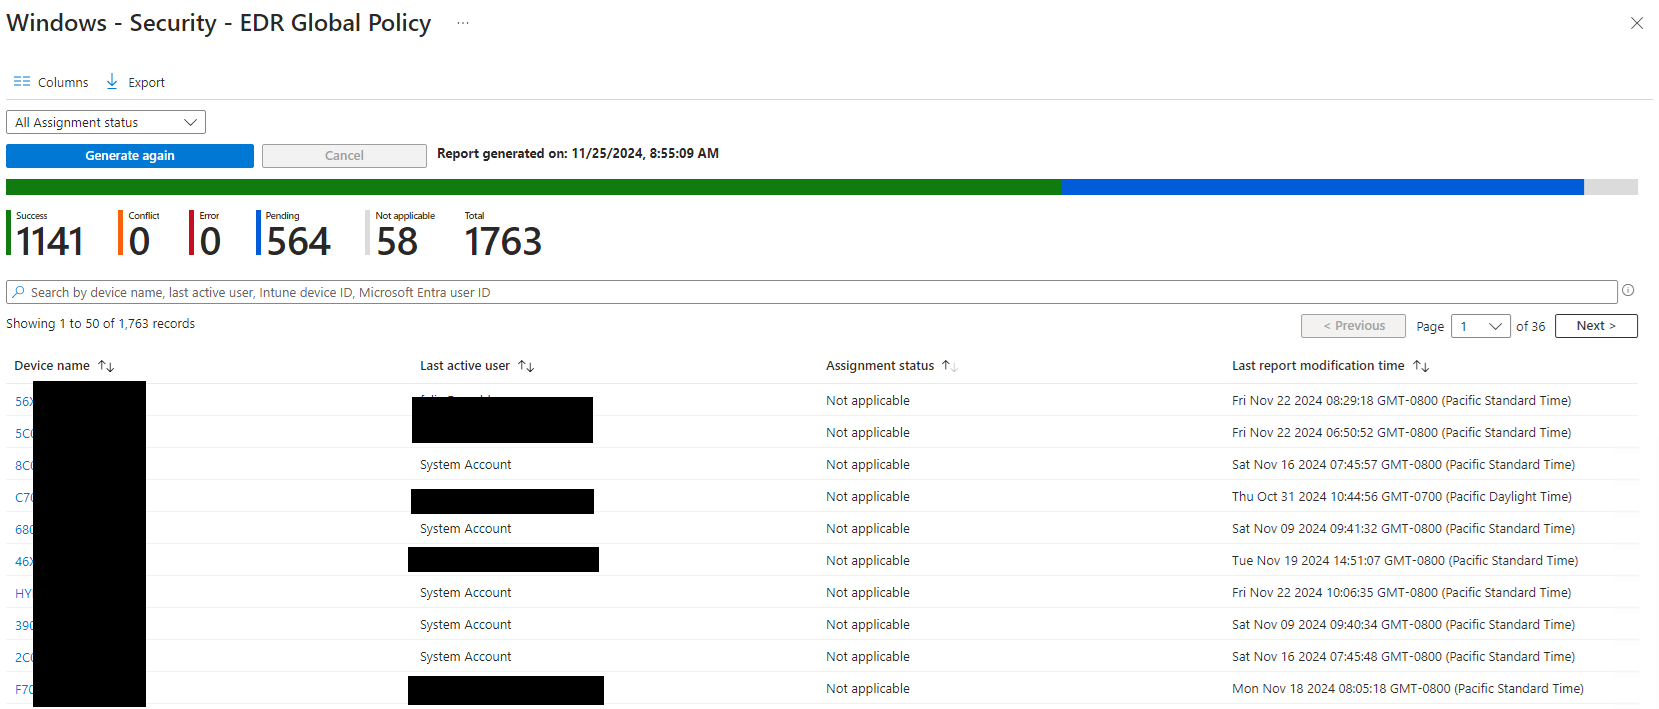
During the Trelix to Defender for Endpoint migration project, I noticed that 58 devices were showing as “not applicable” in Microsoft Intune. These devices were running Windows 11 24H2 and were provisioned by Windows Autopilot. The devices were a combination of Microsoft Surfaces and Lenovo desktops, both of which came with Windows 11 Pro pre-installed. Despite being provisioned with Windows Autopilot, these devices failed to enroll in Defender for Endpoint.

Troubleshooting
The devices were checked to see if they had the Sense client installed and it was found to be missing. I ran the command Get-WindowsCapability -Name ‘Sense‘ -Online to check if Sense is installed and it showed it was not present.

I discovered a workaround in a Microsoft article KB5043950 to manually install the Sense client using the command DISM:
DISM /online /Add-Capability /CapabilityName:Microsoft.Windows.Sense.Client~~~~After running this command, it required a reboot to complete the installation. While this solution worked, I didn’t want the desktop team to have to run this command manually 57 more times, so I developed a script instead.
Solution
Disclaimer: Please make sure to test the scripts provided before deploying to your production devices.
I created my own PowerShell script using PSADT to attempt the installation of the Sense client, offering two options: a forced restart and a prompted restart.
What is PSADT?
The PSAppDeployToolkit is an incredibly flexible tool that simplifies and unifies software deployment, enhancing the management of your IT landscape. It boasts a wide array of features, including dynamic logging, user interaction options, and extensive customization capabilities. Being open-source, it allows users to freely modify and adapt the toolkit to fit their unique needs, encouraging community collaboration and continuous improvement.
PSADT Script
The Deploy-Application.ps1 script contains the installation code. The script will attempt to execute DISM and install the Sense client on line 199. If it encounters an error, the script will output the error and exit.
Execute-Process -Path "dism.exe" -Parameters "/online", "/Add-Capability", "/CapabilityName:Microsoft.Windows.Sense.Client~~~~", "/NoRestart" -PassThru -WindowStyle 'Hidden'If the installation is successful, the script will proceed to the Post-Installation section on line 211. Below are two solutions for a forced restart or a restart prompt.
Solution 1: Forced Restart
The code for the forced restart is located from lines 223 to 227. This section checks if the state is either InstallPending or Staged. If either condition is true, it will initiate a forced restart.

Solution 2: Restart Prompt
If you choose to use the restart prompt, comment out the code from lines 223 to 227 and uncomment the code from lines 231 to 235. The restart prompt countdown is set to 8 hours, and the popup will remain sticky when it reaches 15 minutes or less. You can adjust the number of seconds for Countdownseconds and CountdownNoHideSeconds as needed.

Below is a sample of the restart prompt.

How to Edit the Banner Image
In the source files under the AppDeployToolkit folder, there is an AppDeployToolkitBanner.png file. This is the banner image used in the restart prompt. If you want to customize it for your organization, create a 900 x 125 px banner, save it with the same file name, and replace the existing file.
How to Create the Win32app Package in Intune
Step 1: Package the Application
- Download the Win32 Content Prep Tool from Github. The filename is IntuneWinAppUtil.exe. Save it anywhere on your local drive.
- Download my source files from Github. On the website, click on Code then Download ZIP.

- Extract the ZIP files on your local drive e.g. C:\Defender. Ensure all the files are located in the folder.

- Run IntuneWinAppUtil.exe as Administrator.
- Enter the following in the tool. (Copy and paste works as well)
- Source folder: C:\Defender (path where the source files are)
- Setup file: Deploy-Application.exe
- Output folder: C:\Defender (this is where the .intunewin package will be saved)
- Specify catalog folder: n (n for no)

- Verify the .intunewin file is in the folder. This is the Win32 application file you will require to upload in Intune.

Step 2: Create the Intune Application
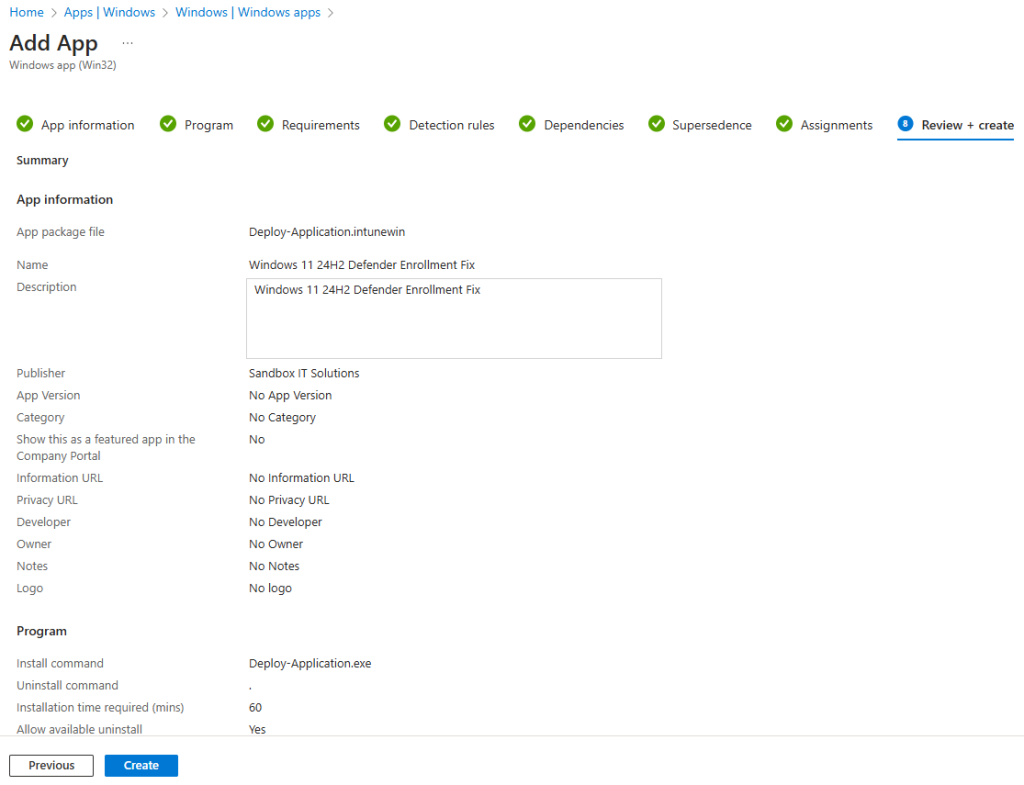
- In Intune, go to Apps > Windows > Add > Windows app (Win32)


- In the App information screen. Select app package file and select the .intunewin file created.


- You will be required to enter information with the red asterisk such as Name, Description, Publisher. The rest of the fields are optional. Click Next when finished.

- In the Program section, there will be two options for the install command. There is no uninstall command so you can enter a dot in there. After inserting the install and uninstall commands, click Next.
- If you are using the forced restart option of the script, there will be no user interaction. The install command will be Deploy-Application.exe.

- If you are using the restart prompt, the ServiceUI.exe must be included in the install command. Since the install is running as SYSTEM, ServiceUI.exe will allow the prompt to show up under the user logged in.
The install command is: ServiceUI.exe -Process:explorer.exe Deploy-Application.exe
- If you are using the restart prompt, the ServiceUI.exe must be included in the install command. Since the install is running as SYSTEM, ServiceUI.exe will allow the prompt to show up under the user logged in.

- In the requirements tab, you can select the OS architecture and minimum operating system. Currently, Intune does not have Windows 11 24H2 so you can select 23H2. Click Next.

- For Detection rules, select use a custom detection script.

- In the source files under Docs folder there is a Custom Detection.ps1 PowerShell script. Select the script and click Next.

- In the Dependencies section, there are none. Click Next.

- In the Supersedence section, click Next.

- In the Assignments section, click Add group and add the group that contains the devices you want to deploy to. You can create a manual assignment group or if you wanted to deploy to all Windows 11 24H2 devices, you can create a dynamic device group. Click Next.

- In the Review + Create screen, confirm your settings then click Create.

Results
When the script is deployed to the device, it takes about 15-20 minutes to run. There will be a log file under C:\Windows\Logs\Software.

After installation, depending on the solution you chose, the device will either perform a forced restart or display a restart prompt. Upon restarting, the device will begin installing the Sense client, and this will appear on the screen during reboot.

After the restart and once the user logs back in, it may take some time for Defender to attempt to onboard the device. Intune will then display that the device is onboarded. You can also verify this in the Defender Security Portal.


Thanks for sharing. This helped me fix this at my org, worked like a charm! I hate Windows 11 24H2 for giving me this headache.
Thanks for sharing. I read many of your blog posts, cool, your blog is very good.